Decentralized applications, or dApps, are typically web applications that utilize the blockchain as their backend. This is what makes a dApp decentralized. For now, we’ll only focus on what the end-user sees when using Uniswap. And, this is just the beginning of Web3 tutorials for product designers. Stay tuned for future Web3 Design Courses where we discuss emerging dApps that will disrupt the internet as we know it today.
Uniswap was one of the first dApps to gain product-market fit in the Web3 ecosystem. It’s a decentralized exchange (i.e. “DEX”) that allows users to swap one token for another. Of course, you can buy and sell tokens on crypto exchanges; however, Uniswap is different in that there are no intermediaries facilitating the trade, or custodying the tokens along the way. Instead, Uniswap, and other decentralized exchanges, run on software deployed to a blockchain that facilitates this token swap in a “trustless” way.
When I say, “trustless” I mean that neither I, nor the strangers I’m swapping with, have to trust each other, or any other centralized entity, to make this swap. All we need to trust in is the objectivity, and deterministic nature of the blockchain. Also, Uniswap’s code is open-source, and can be audited by anyone to ensure that it will execute in the way it’s expected to. “Trustlessness” is a fundamental property of Web3. Let’s walk through swapping tokens on Uniswap.
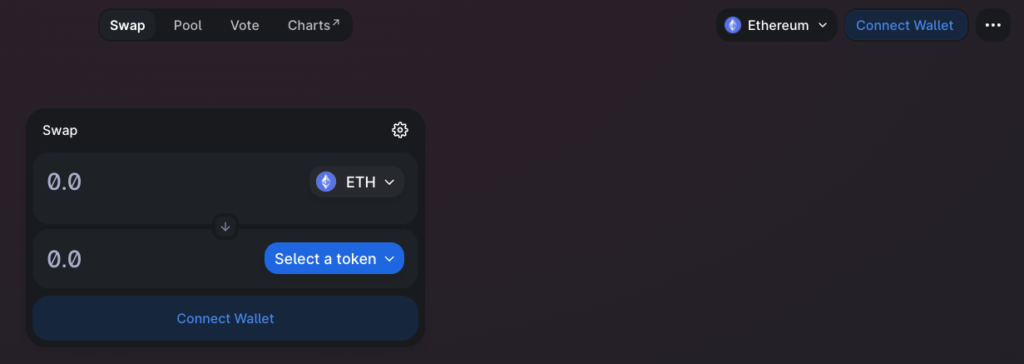
It starts with a fundamental Web3 design pattern: connecting a wallet to the dApp.
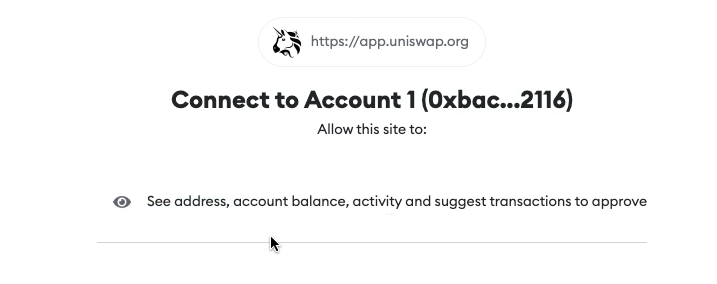
A MetaMask popup requires users to confirm this connection request, and allow Uniswap to access their wallet address, account balance, activity, and suggest transactions. Connecting the wallet does not give dApps access to user private keys (i.e. the secret recovery phrase we’ve discussed prior).

Users know the wallet has been connected once their wallet address, and ETH balance, displays in place of the “Connect Wallet” button.

On the Uniswap UI, users select the token they want, and how much of Token A they want to swap.

MetaMask then displays a transaction confirmation screen. This screen should look familiar, because it’s the same confirmation screen that displays during the send flow. Note that the two concepts we talked about in the previous section, network fees and confirmation delays, apply when using Uniswap, and all other dApps for that matter.

Once the Uniswap transaction has been confirmed, users can check that the new token has landed in their wallet.
You may be surprised just how similar this Web3 dApp looks compared to all the Web2 applications that we use on a daily basis. The tech stack used to implement the UI is the same between Web3 and Web2. Both use programming languages like HTML, CSS, and Javascript to build out the frontend UI. The difference comes in when talking about the backend. Web3 backends are built using decentralized blockchains as opposed to the centralized servers of Web2. This is what makes the dApp “decentralized”, and is the source of the unique Web3 properties like “trustless”, “permissionless”, and “censorship-resistant”.

That concludes the user-journey of onboarding into the Web3 ecosystem. We went from fiat money, purchased crypto with it on an exchange, created a Web3 wallet, and transferred the crypto from the exchange into the wallet. We sent crypto to another wallet, and finally connected the wallet to a decentralized application.
You’ve seen the UX and popular design patterns of flagship Web3 products like wallets and dApps. Future Web3 Design Courses will cover the emerging categories of the Web3 ecosystem. The content will give you a means to look beyond the cutting-edge, and envision the next disruptive developments in the Web3 space. The remaining sections of this article go more in-depth on what’s happening when you create a wallet, send crypto to another wallet, and use a dApp.
This will be good for designers interested in building simple mental models of the technologies that underlie Web3. I believe it’s important to have a basic understanding of what is happening on the backend to be an effective designer. Building this understanding, along with what you’ve already learned, is all the preparation you need to become a Web3 product designer.
If you enjoy videos over reading when it comes to online learning then checkout the course on YouTube. This is part 5 of 9 in the Web3 Design Course 2022. Also, make sure to stay tuned for future Web3 Design Courses where we will get into more interesting topics about emerging dApps.
0 Comments